Trending New Beautiful Green Theme Photo Editing in Alight Motion A_M30

Beautiful Green Theme Photo Editing in Alight Motion

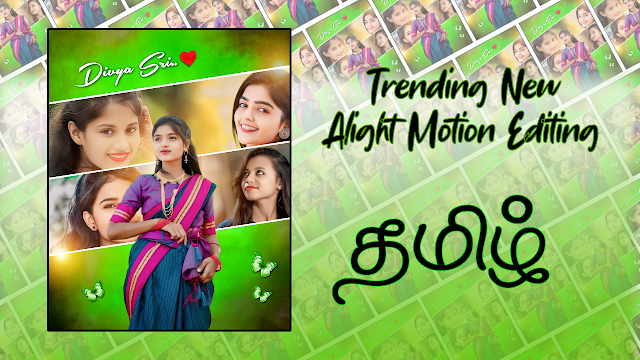
Creating a stunning green-themed photo edit using Alight Motion is an excellent way to enhance your images with vibrant and refreshing colors. Follow this step-by-step guide to create a beautiful green-themed photo edit in Alight Motion.


Trending Photo Editing in AlightMotion

Step 1: Install AlightMotion

Before you begin, make sure you have AlightMotion installed on your device. You can download it from the Google Play Store or Apple App Store.


Step 2: Open AlightMotion and Create a New Project

1. Launch AlightMotion and tap the + icon to create a new project.

2. Set the project settings, such as resolution and frame rate, according to your preference. For photo editing, the default settings are usually sufficient.


Step 3: Import Your Photo

1. Tap the + icon again and select Image & Video.

2. Choose the photo you want to edit from your gallery.


Step 4: Adjust the Background

1. Tap on your photo layer and select Effects.

2. Add a new effect by tapping the + icon and chooseColor & Light.

3. Select Hue Shift and adjust the hue slider to shift the colors towards green. You can fine-tune the hue to get the desired shade of green.


Step 5: Add Green Elements

1. To enhance the green theme, you can add green overlays, shapes, or text.

2. Tap the + icon, select Shape, and choose a green color for the shape. You can use rectangles, circles, or custom shapes to complement your photo.

3. Position the shapes around your photo to create a balanced composition.


Step 6: Apply Filters and Effects

1. Tap on your photo layer again and select Effects.

2. Add a Saturation/Vibrance effect to boost the green colors in your photo.

3. Adjust the Brightness/Contrast to enhance the overall look of your photo.


Step 7: Add Text (Optional)

1. Tap the + icon, select Text*and type your desired text.

2. Choose a green color for the text and position it on your photo.

3. You can apply effects like shadow, outline, or glow to make the text stand out.


Step 8: Export Your Edited Photo

1. Once you are satisfied with your green-themed photo edit, tap the Export icon in the top right corner.

2. Choose Export as Image and select your desired format and quality settings.

3. Tap Export to save the edited photo to your gallery.


Font : DOWNLOAD


Alight Motion preset : DOWNLOAD


Tips for a Stunning Green Theme Edit

- Experiment with different shades of green to find the one that best suits your photo.

- Use complementary colors like white or black for text and shapes to create contrast.

- Add subtle effects like bokeh or lens flare to give your photo a magical touch
Comments

Popular posts from this blog

Trending New Beautiful Orange Background Dual Photo Editing in PicsArt In Tamil Pics120

Beautiful Orange Background Dual Photo Editing in PicsArt In Tamil   If you love vibrant and warm-toned photo edits, then an orange background dual photo edit is the perfect choice! PicsArt makes it super easy to blend two photos seamlessly with a bright orange background, creating a stylish and eye-catching effect. In this tutorial, I’ll guide you step by step on how to create a stunning dual photo edit using PicsArt. What You Need: ✔ PicsArt App (Available for Android & iOS) ✔ Two Photos (The images you want to edit) ✔ Orange Background Image (You can download one or create your own. Step-by-Step Guide for Orange Background Dual Photo Editing Step 1: Open PicsArt & Select Your Background First, open the PicsArt app and tap on the “+” (Add) button. Now, choose your orange background image from your gallery. This will be the base for your edit. Step 2: Add the First Photo 1. Tap on “Add Photo” and select the first image. 2. Use the Cutout tool to remove the background....

Trending New Dual Photo Editing in Gold Background with Name Using PicsArt Shorts09

Dual Photo Editing in Gold Background with Name Using PicsArt Creating visually stunning edits with a dual photo layout against a gold background can add a touch of elegance to your images. Using PicsArt, you can easily achieve this professional look with a few simple steps. Follow this guide to create a beautiful dual photo edit with a gold background and add personalized name art. Trending PicsArt Photo Editing Step-by-Step Guide Step 1: Prepare Your Photos 1. Choose Your Photos: Select the two photos you want to use for your dual photo edit. Make sure they are of high quality for the best results. 2. Open PicsArt: Launch the PicsArt app on your device. Step 2: Create the Gold Background 1. Create a New Project: Tap on the ‘+’ icon to start a new project. 2. Select Background: Choose a gold background from PicsArt's library or upload your own gold texture image. 3. Adjust Background : Resize the background to fit your canvas. You can do this by dragging the corners of the backgro...

Trending New Multiple Photos Editing in White Background Using PicsArt Pics64

Multiple Photos Editing in White Background Using PicsArt Introduction: Creating stunning photo edits with multiple photos on a white background is a great way to showcase your images in a clean and professional manner. PicsArt is a versatile app that makes this process easy and enjoyable. In this guide, we'll walk you through the steps to achieve this. Trending PicsArt Photo Editing Step-by-Step Guide: 1. Download and Open PicsArt:    - Ensure you have the PicsArt app installed on your device. If not, download it from the App Store or Google Play Store.    - Open the PicsArt app and sign in or create an account if you don't have one. 2. Start a New Project:    - Tap on the plus (+) icon at the bottom of the screen to start a new project.    - Select "Edit" from the options. 3. Choose a White Background:    - Tap on "Backgrounds" and select a plain white background. If you don't see a white background, you can create one by selecting a b...